Therapeutic exercises >>>> Rehabilitation after a wrist injury
Rehabilitation after a wrist injury.
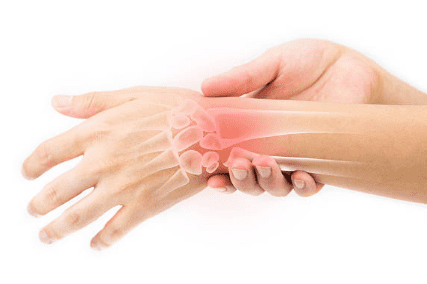
The wrist joint is considered one of the most common places for injury, since it has unique all-round mobility, and in some people with hypermobility of the joints, it can have almost unlimited mobility. Injuries to the wrist joint (or more precisely, the wrist joint) can affect not only the work of the hand in the wrist area, but also the work of the palm, since they have common ligamentous-muscular structures.
Wrist injuries are inevitable in the most common situations in life: falling on the arm, unsuccessful arm rotation, sprains of the wrist joint when lifting weights or excessive physical exertion on the joint. A simple hit with the wrist area, for example, on a ball, can be a common cause of injury to the wrist joint.
In case of complex fractures (multi-splintered and or with displacement of bone fragments), the basis for a successful restoration of the joint is the exact reposition of fragments and displaced small bones, and in the future, complete rehabilitation of the joint depends on the quality of restorative exercises to develop the area of the wrist joint itself and the muscles adjacent to it.
Rehabilitation of the wrist joint begins long before the removal of the splinting bandage (plaster cast, splint) and consists in forced movements of the muscles and joints of the injured hand.
The set of exercises to restore the wrist joint includes exercises for the hand of the injured hand and wrist joint:
Exercise 1. (performed with a palmar expander and without an expander): firmly squeeze the hand into a fist with tension in the muscles, extending to the area of the wrist, which is in the splint. Relax compression. Repeat the exercise 20-50 times a day depending on the level of injury healing. Simple squeezes of the palm alternate with squeezing the expander.
Exercise 2. A large object (larger in volume than the hand) is grasped by the palm so that the muscles and ligaments of not only the palm area, but also the phalanges of the fingers are strained. The item is released and grabbed again. Repeat the exercise 10-15 times in three or more approaches, increasing the number of approaches every day. This exercise, even at the stage of healing injury, will force the processes of tension of the ligaments and tendons that run towards the wrist joint.
Exercise 3. Palms turn to each other and press one against the other, first in the direction of the vertically positioned palms (lateral force), then from top to bottom (palm on palm, where the palm of the injured hand is on top). Repeat exercises in 1-2 or more approaches 15-20 times in one approach.
Exercise 4. Fold the phalanges of the fingers of the wrist of the injured hand with the beak with the tension of the tendons and muscles, then transfer to the position of squeezing into a fist, squeezing the palm with effort. Repeat the exercise 15-20 times in two or more approaches, increasing the number of approaches daily by two.
Exercise 5. (Performed at the stage of removing the tire). Take a stick with a cross-section of at least 4 cm in both palms and turn it alternately with the left and right hand, rotating it inside the palms. The exercise is repeated one approach 10-15 times with a daily increase in the number of approaches to the exercise by 1-2 approaches. This is one of the key exercises for developing the wrist joint.
Exercise 6. Performed with a rubber bandage or band expander. Pull a rubber bandage or expander between the two fasteners so that the rubber does not sag, but is pulled by the "string". Grab the middle of the stretched rubber with a brush and pull towards you from the bottom up and towards yourself in a horizontal direction, thus forcing small tendons and muscles to work at different depths of the wrist. Repeat the exercise in 1 or more sets of 15 times, increasing the number of sets daily.
Exercise 7. (with a rubber bandage or expander). Fasten one side of the rubber bandage or tape (spring) of the expander in a stationary position, and pull the other end with the injured hand towards yourself, turning the wrist in different directions (brush towards yourself, brush away from you, brush up, brush down). This exercise works all the muscles in the wrist joint, loads the wrist joint itself significantly, and is key in the rehabilitation of the wrist joint.
Exercise 8. Stand sideways near a vertical surface at a distance of one step, rest the palm of your bent injured hand on the surface (wall, closet, fence) and unbending your arm at the elbow joint, as it were, push off the surface with your palm. It will return to its original position - the hand is bent and rests with the palm on the surface. Thus, the weight of the body will act on the joint, moderately loading it with work. Repeat the exercise 10-15-20 times in 1-2 or more sets, increasing the number of sets every day.
Exercise 9. Sit down near the table (high chair) and leaning first with both hands, and as the load increases with only the injured hand, stand up with support on the arm. Repeat the exercise 10-15-20 times in one two rounds, increasing the number of approaches to the exercise by one or two times.
Exercise 10. Capturing a sports ball and rolling the ball between the hands with the transition from the inside of the palm to the outside, while keeping the ball from falling.
Exercise 11. Rotation of the wrist joint. For these purposes, at home, you can use a manual sewing machine or a manual meat grinder. Rotate the handle away from you and towards yourself twenty times in each direction in one or two approaches, increasing the number of approaches by 1-2 every day. The gym has a special trainer for developing and training the wrist joint in the same way.
Exercise 12. Performed with complete healing of the wrist joint, when the latter is already trained for various types of load. Spin from a high bench. It is performed in 1 or more sets of 1-2-3-4 - and so on - 10 times as the joint strengthens with increasing approaches daily.
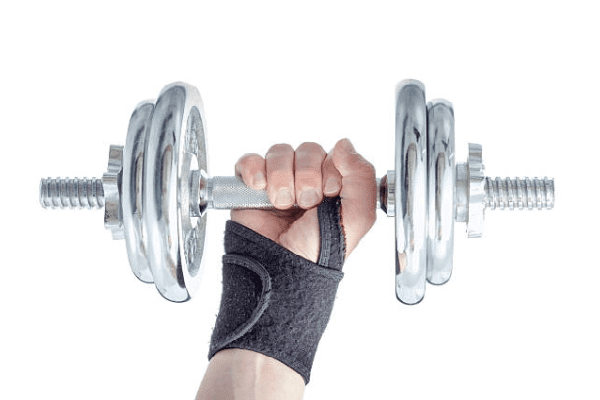
Exercise 13. Performed with weights (dumbbells of various weights, where the weight changes depending on the condition and fitness of the injured joint). Raise your arms spread with dumbbells to shoulder level. Perform a load of 1 or more approaches 5-10-15 times in one approach, increasing the number of approaches and changing the weight of the weights daily as the joint ligaments are strengthened. Exercise is key to wrist rehabilitation and requires dosing in order not to overload the wrist with weights sooner than necessary.
Exercise 14. Performed on a horizontal bar or any crossbar adapted to support a person's weight (it is possible on a strong branch of a tree). He will grab the crossbar with both hands and, having lifted his legs off the ground, hang for a few seconds, forcing the wrist joint to get used to weight loads.
Timely and regularly performed set of these exercises for the rehabilitation of the wrist joint will allow you to quickly restore the work of the joint and avoid contractures in the muscles and connective tissue of the wrist ligaments.

Read

Read


